Home » sensory

Tag: sensory

Colored Rice & Noodles

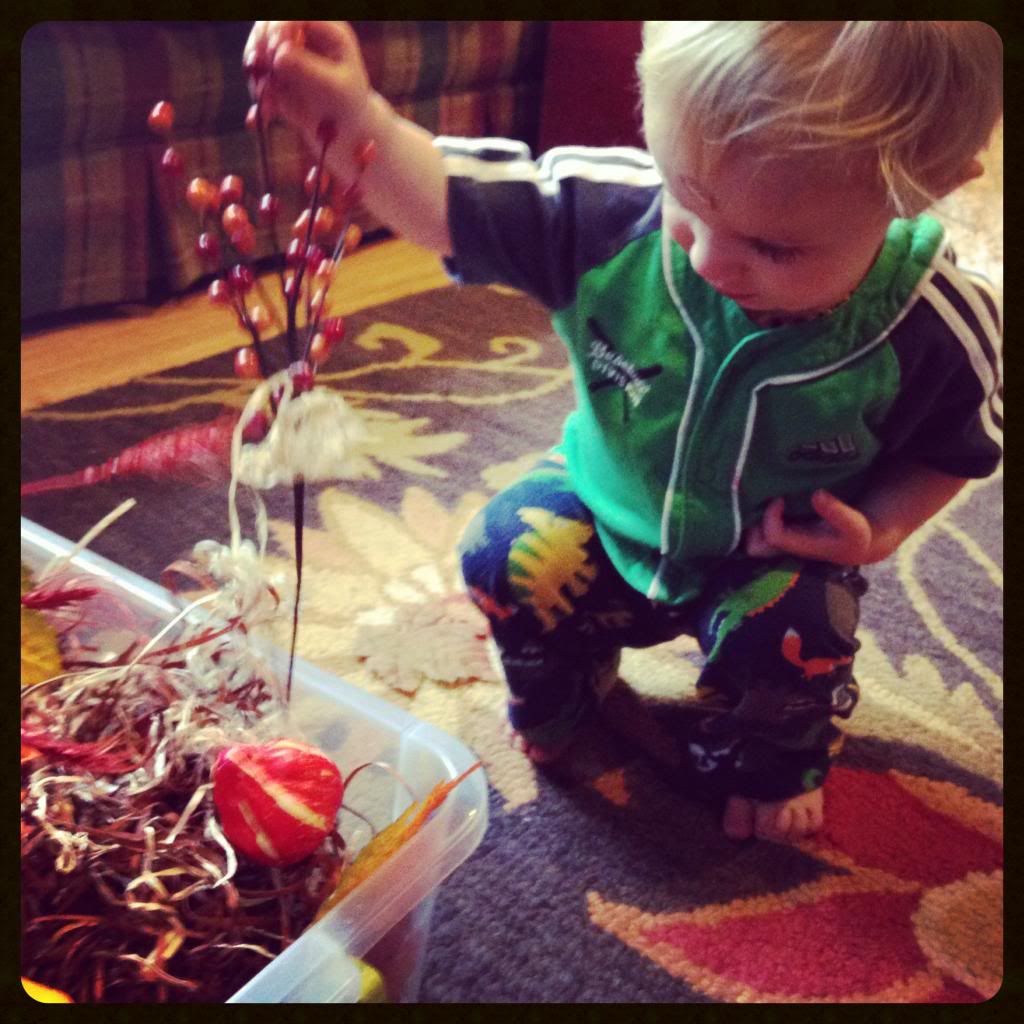
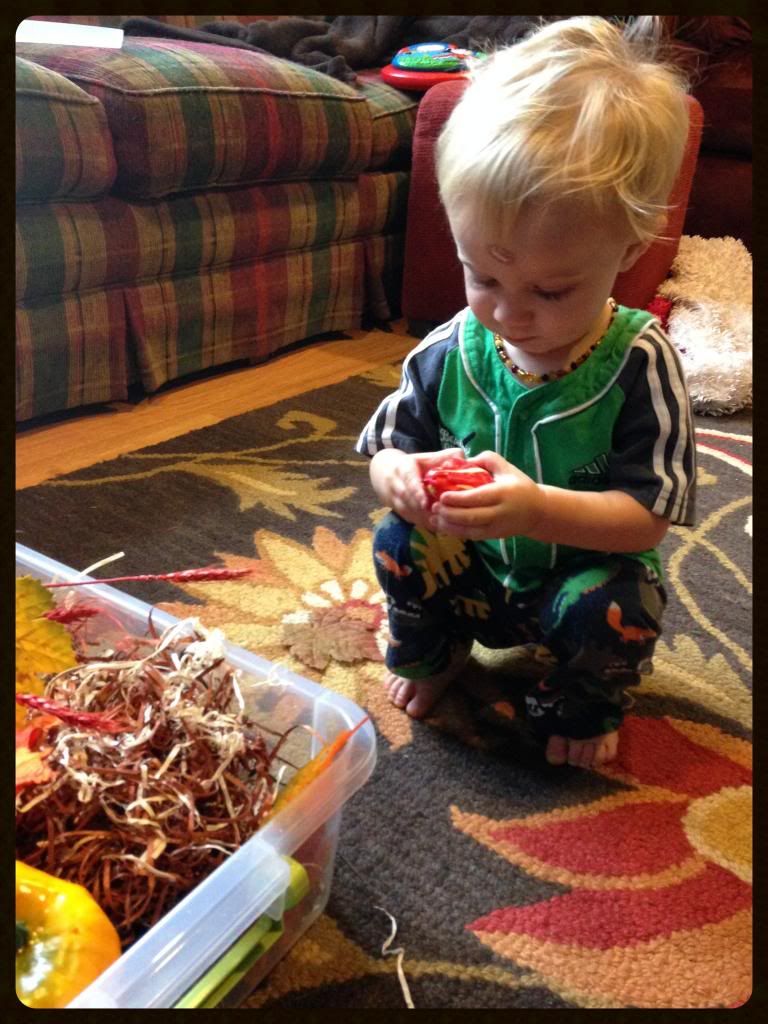
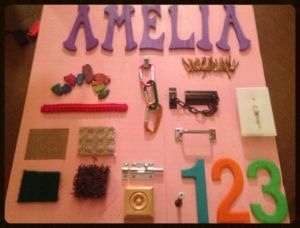
I love sensory play! There are so many different ideas on Pinterest. There is no right or wrong way creating a sensory activity. The best part is, you usually have everything in your home OR it’s super cheap to pick up the few items you may need.

One of our favorite sensory activities is playing with colored rice.

This is normally an outdoor activity for us. We did the rice sensory play inside once and well … it was a mess! I was still vacuuming rice up a month later! I know some lay down a large towel or tablecloth to “catch” the rice and that works for them. My son likes to get a little wild, so we keep it as an outdoor activity πŸ™‚

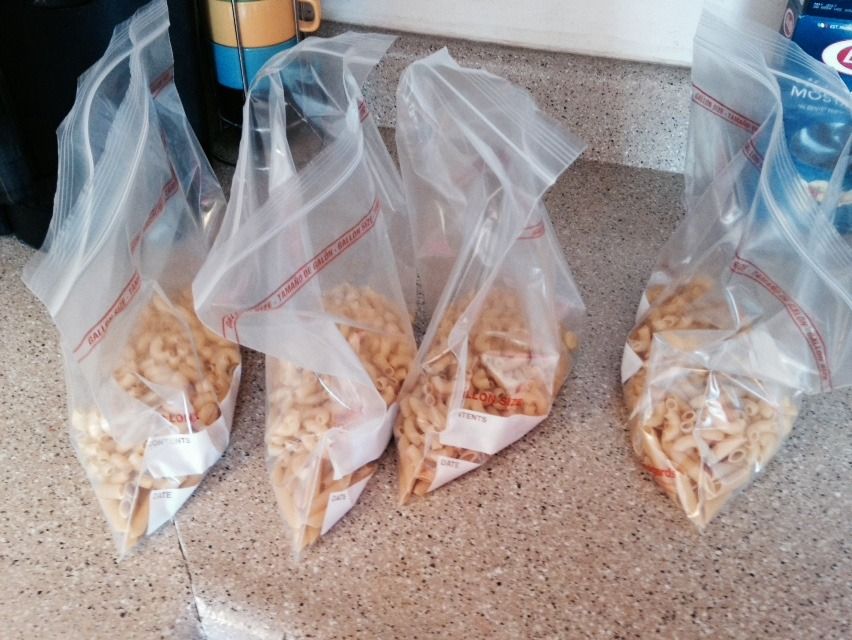
Noodles are great to dye also. You can use them for sorting, making necklaces, throw in a large bin, and more. It is SUPER easy to dye everything at once. You could also dye oats and sand, but I chose to just stick to rice and noodles today. This entire process was about 30 minutes long and it could even take less time, if you have kiddos to help!

30

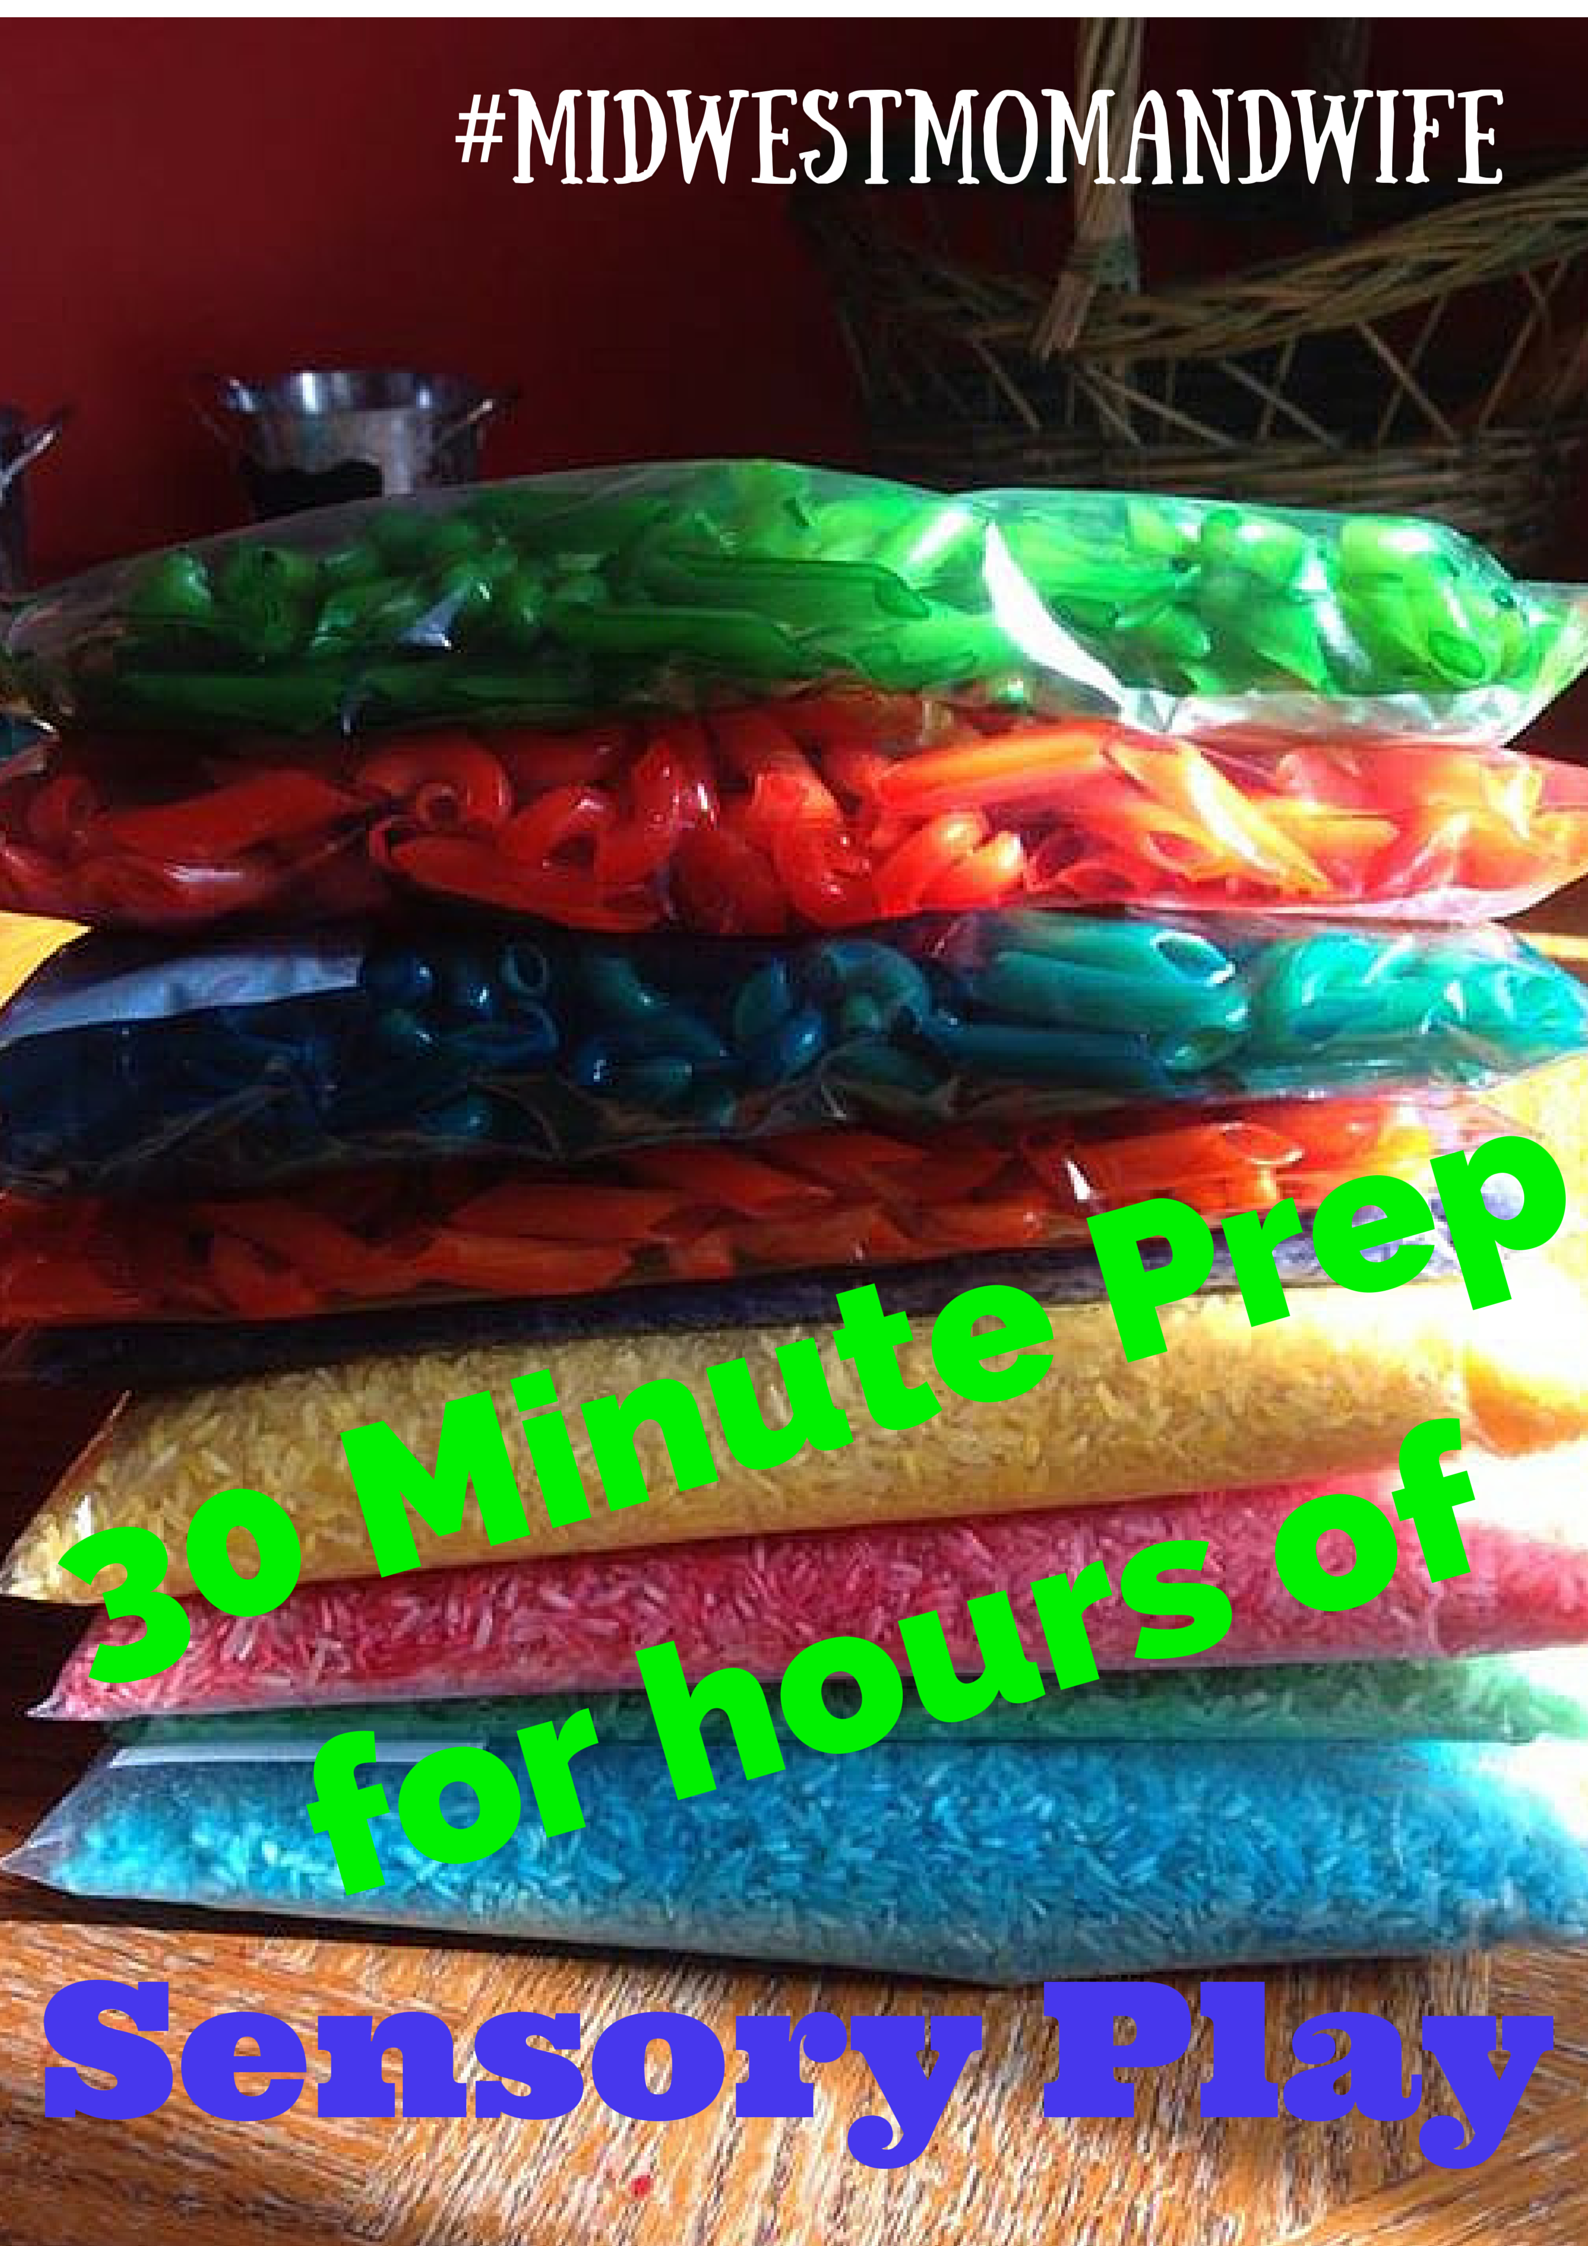
  1. Place your noodles and rice into gallon bags. Just eyeball a good amount. I put about 3 cups of rice into each bag and about 2 cups of noodles in each bag.Β 
  2. Place about 2-3 Tablespoons of alcohol into the bags.
  3. Squirt 2-3 drops of food coloring. You may want to add more in a bit.
  4. Seal the bags. Make sure they are sealed well or it will be a mess!
  5. Begin shaking! This is where the kids can help.
  6. If the colors are not bright enough for you, add more food coloring.
  7. You can now open the bags and let them dry out, or spread onto parchment paper. I keep them sealed overnight, then let them dry out the next morning. This allows the color to sit a bit longer.
  8. HAVE FUN!

Check out my other fun sensory activities and ideas!
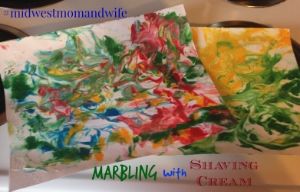
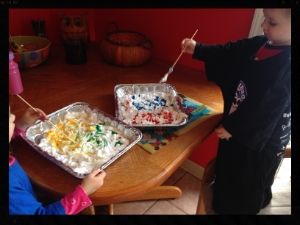
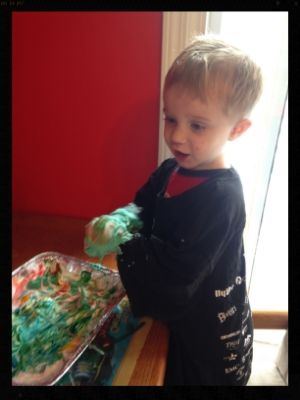
  1. Red Activity Box
  2. Fall Sensory Bin
  3. Sensory Board

DIY Sensory Board

This Christmas we struggled with ideas on what to get Amelia as a gift. She was only 4 1/2 months old, so there wasn’t anything she needed or wanted. I came across this idea for a Sensory Board from someone else and searched them on Pinterest. I had no idea how popular they were! When you search for them, so many different types popped up! I was so excited to do this for Amelia. It was inexpensive and creative.

We purchased everything from Menards, besides a few items we purchased at Michaels. Here is what we used for our sensory board:

  1. You need a board – Ours is 2 feet by 2 feet. You can get much larger or smaller. We thought this would be the perfect size to pull out and store away when it is not being used.
  2. Spray paint – I decided to spray paint ours pink. There are a lot of people who just leave it the natural wood color also. It’s whatever YOU want to do!
  3. Chain door guard
  4. 3 inch spring door stop
  5. Switch & plate
  6. Red paracord bracelet
  7. 3 carabeeners, different colors
  8. 3 carpet samples
  9. Sandpaper
  10. Door chain
  11. Sash lift
  12. Spiky wood chain – Michaels
  13. Colored glass rocks – Michaels
  14. Super Glue
  15. Wood Glue
  16. Screws & Drill
  17. Wooden letters & numbers – Michaels
  18. Various paints for letters & numbers – Michaels
  19. Wooden square sample

Total at Michaels – $25.86

Total at Menards – $38.50

Total = $64.36

I love how this turned out. I also love that you can do anything to create it your own. Travis and I enjoyed creating this together too!

Marbling with Shaving Cream

I came across another fun and easy activity on PinterestΒ … Marbling with Shaving Cream!

There are all sorts of tutorials on Pinterest for this activity. I used this site as a guideline. This is what we did!

Supplies

  1. Foam shaving cream – I always have several cans on hand because there are so many activities that use shaving cream!
  2. Shallow dish – You can use a 9×13 glass dish or pan. I have some foil ones, I have kept for other activities I’ve done.
  3. Food coloring – You can use water color paints, tempera paint, etc. Whatever you may have on hand.
  4. Thicker paper – You do not want to use regular printer paper, otherwise it wont hold up well. We used 8×10 white card stock.
  5. Β A wooden dowel – I happened to have this on hand and it worked really well for swirling, You could also use a plastic knife, popsicle stick, a finger (that may get messy). Whatever you think is best!
  6. Butter knife – You use this to scrape off the excess shaving cream off the paper.

Directions

  1. Squirt shaving cream into your shallow dish and squirt several colors of food coloring into dish.
  2. Give child a wooden dowel or whatever utensil they will be using for swirling.
  3. Swirl away!

This quickly became a sensory activity πŸ™‚ Monte really enjoyed the feeling of the shaving cream. Good thing I put them in their painting shirts!

4. Once they are done swirling and creating their design. Take your piece of paper and place it down into the shaving cream. Press it down with your hand. Then slowly pull it up.

5. Flip it over, take your butter knife, and scrape off the extra shaving cream over the sink.

6. Set it to the side and let dry!

This is one Pinterest project that was easy and actually turned out how it was supposed to! I also had everything on hand!

What is your favorite activity to do with shaving cream? Besides shaving πŸ™‚Β 

Fall Sensory Bin

I created such a fun activity bin for Monte … a Fall Sensory Bin!

He absolutely loves it and I absolutely love it because I love fall (if you had not heard).

Anyways, all of these items I picked up from the Dollar Store and Michaels. I also had quite a bit of these items already.

You can put whatever you want in your bin, but some things I included were: gourds, leaves, a fake little owl, mini pumpkins, basket filler, tall red feathered grass, acorns, and a sensory jar.

Some things you could add or use instead: hay, pine cones, wood chips, corn stalks, small scented tealight candles, etc. I almost did the candles for Monte, but I was concerned he would try to eat them instead.

We worked on our colors (red, yellow, brown, orange), touch (rough, crinkly, tickle, soft) and smelling certain items.

As mentioned above, I also made a sensory jar. Monte loved this! At Michaels, I found little glass pumpkins. I put a few of those and a leaf into the jar. I filled it about a third full with water and added 1/3 cup vegetable oil.

Β The picture isn’t the greatest, sorry. But, the vegetable adds a really cool effect to the pumpkin beads when you shake it.

Overall, the bin was a hit! I definitely recommend for you to try it out!

What type of sensory bins have you made for your kiddos?

Keeping Busy and Upcoming Posts

There has been so much going on lately! And a lot of ideas are generating for posts. Here is a glimpse …

20130926-143759.jpg
Starbucks has been my latest addiction! I cannot get enough of the Pumpkin Spice Latte and Salted Caramel Mochas! But, let me tell you, I’m definitely feeling it now πŸ™

20130926-143959.jpg
Of course, I’ve been spending time with this little nugget! Love him to pieces!

20130926-144048.jpg
Ummm … I came across these amazingly, ridiculous chips! Check them out!

20130926-144134.jpg
I’m doing some MAJOR research regarding the Paleo eating lifestyle. It’s looking more and more like I may give it a try! Keep your eyes out for my final decision and thoughts!

20130926-144252.jpg
Mr. Monte and I are going to give sign language a try! Keep your eyes open on how well it works for us πŸ™‚

A Fall Sensory bin is in the works! Keep your eyes open for the results and reaction!

20130926-144449.jpg

AND last, but definitely not least, we have been spending time with our favorite Bassett Hound, Elvis!

Have a wonderful evening everyone!